By Celeste (Crickets), Designer & Creator of Fringies Professional Photography Portrait PropsNOTE: Please click
HERE to learn more about the double size Super Fringie (twice as large as the Fringies shown in this post, the Super expands to an oval about the same size as a sheepskin)
Thank you for choosing
Fringies for your portrait photography business! Below are some great ways to get the most use out of your new photography prop.
Your Fringie will arrive folded and possibly a bit compressed from its journey. Remove it from its packaging, carefully unfold and gently shake, fluff and finger-comb, combing with the fingers of one hand while (optional) stabilizing the center seam with the other (it’s kind of like caring for a very colorful wig)!
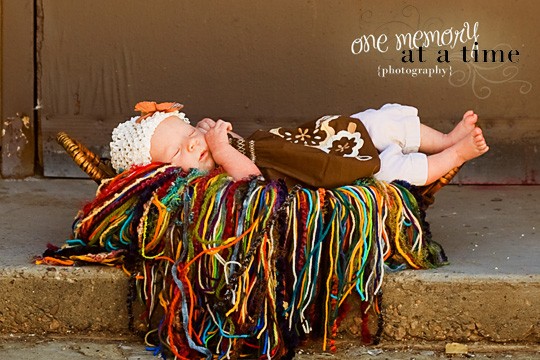
Spreading your Fringie out into an oval shape allows for maximum coverage, giving two feet of additional length (one foot of fringe will extend past each end of the center seam). This technique is especially helpful to create a “halo” of color all around a newborn baby. Lay the Fringie down in its rectangular shape:

Then spread out either side of fringe like a fan into a semi-circle, so that it will create an oval. Here’s a picture that shows the seam and how the yarn is arranged:

It’s helpful to pat and jiggle the thick yarn at the center of the “fans” to spread it out toward the ends, and to finger-comb the yarns into place, combing with the fingers of one hand while stabilizing the center seam with the other. It doesn’t have to be perfect! Typically, the baby’s spine will lie along the (comfortable) center seam. Here’s an example from award-winning photographer Wende Trew of
A Timeless Image of my
Rainbow Fringie:

Another option is to use a basket in conjunction with a Fringie (TIP: TJMaxx can be a great source for prop baskets at a value price; I hear from my photographer customers that if the basket seems too small in the store, it's probably just right for newborns). Smaller baskets can be lined completely with the Fringie, like this image of the
Bohemian Fringie by photo pro DeeDee DiMarco:

First, drape the Fringie over the front side of the basket like a towel hanging to dry (with the center seam parallel to the lip of the basket). Then, bring some fringe to the back, inner wall of the basket, as shown above.
For larger or deeper baskets, fill the bottom with folded towels or blankets to bring the baby and the Fringie into better view, as in the image below of my
Rainbow Fringie, also by Wende Trew (the cute hat was knit by Allison of
Pinch Knits):

Here's another example of a basket filled with towels with my
Reversible Candy Shoppe Fringie on top...thanks for the photo, Suzanne Ivey of Ivey's Photography:

Or for maximum fringe showing outside the basket, bring both sides of fringe to the front, with the seam running from the inside lip of the basket toward the bottom of the basket (perpendicular to the floor), as in this photo by Tonia Kinch of
Delicate Impressions Photography. This is a standard sized
Candy Shoppe Fringie, yet it looks huge:

Here's one more from Tonia of the same Fringie, different baby, different pose (get the matching hat
here):

I like how Kristina of
Visual Empathy doubled my
Bohemian Fringie slightly off-center for a full, "layered" effect, then brought all the ends to the front of the basket:

The Fringie can also be used as a newborn nest, as in this image by Leslie Cowger of
LC Photography of the
Rainbow Fringie:

or this shallow basket nest by rising star Amanda Cutler of
Pumpkin Pie Photography with my
Bohemian Fringie:

Here's another nest from
Tracy Joy Photography, made with my
Oatmeal Fringie:

Check out this pioneering idea from
Heavenesque (my
Oatmeal Fringie used as a blanket wrap!):

Here are a couple of other ideas for the
Bohemian Fringie from
Laura Bailey Photography:


To store your Fringie away from dust or pet dander, either drape it over a pants hanger and hang in a closet, or carefully fold and store on a covered shelf or in plastic.
Fringies are stain and wear resistant. For occasional spot cleaning, hand wash in cool water with mild soap. Do not wring (gentle squeezing is okay, please do not twist). Dry flat (or blow dry on cool setting).
For more photos or to contact me with questions, please visit my
online boutique. Thank you again for your support, I'll end with a little photo gallery from some of my professional photographer customers who have been kind enough to send me pics from their photo sessions with my
Fringies:
I love these photos of my
Oatmeal Fringie from
Neta Herron Photography and how she's put a snuggly blanket underneath as a backdrop for Fringie and Baby:


Here's a fun photo from
Brianne Elizabeth Photography of her daughter Raelyn modeling my
Reversible Candy Shoppe Fringie (Raelyn is 16 months in the picture and there's just room for the Fringie to drape over the front of the larger basket--it still looks great)!

And another from Brianne, same Fringie, this time with a tiny newborn:

Lastly Brianne shows a
Reversible Candy Shoppe Fringie with the more masculine side up:

I love this fantastic shot from Dawn Simmons of
Lasting Treasures Photography of my
Bohemian Fringie...little Bella weighs only five pounds!:

Here's a beauty from Nicole Pellegrino of
Snips & Snails Photography of my
Rainbow Fringie:

And just in from Christina Traster of
Snickerdoodles Photography of my
Bohemian Fringie:

These two photos of my
NEON Rainbow Fringie from Abbi Garling of
Your Memories Photography are so different, I cherish them both:


Here's a great pic of the super-expressive Brayden, son of Leslie Cowger of
LC Photography of the
Rainbow Fringie:

NOTE: Please click
HERE to learn more about the double size Super Fringie (twice as large as the Fringies shown in this post, the Super expands to an oval about the same size as a sheepskin)
Please continue to check back for more fun photos; I'm adding all the time as my wonderful photog pro customers send them to me (thank you, thank you, you are truly cherished)! :)